Zeropointzerozerozero
The balancing act between the upper and the lower limit
If high-tech companies and research institutes from Adlershof need precision components, they go straight to the precision technician next door.
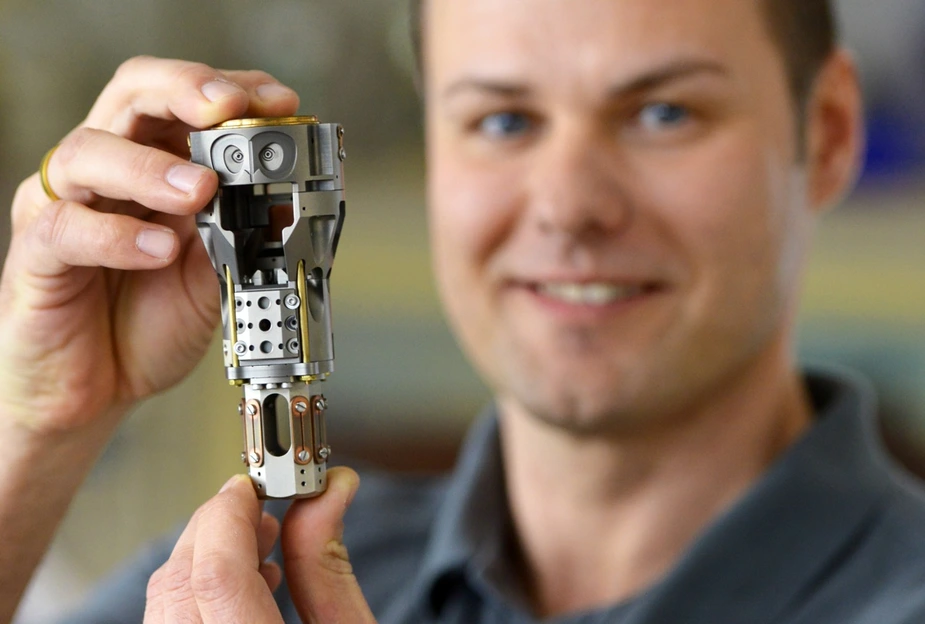
There is a persistent hum. Uwe Steingross, head Uwe Steingross Feinmechanik GmbH, returns to his office from the manufacturing hall filled with 5-axis mills and 8-axis lathes. “Tolerances are what it’s all about,” he says, balancing a part of a scanning probe microscope in his hand, a highly complex, metal component. A tip comprised of just one conductive atom moves over the conductive probe in a regular raster at temperatures near zero in a vacuum. By looking at electron flows between the tip and the probe in this way, it is possible to measure surfaces on the nanoscale. The component Uwe Steingross was holding earlier translates between the nanoscale and the clumsy user. Two knobs setting in motion a complex system of gears and metal joints enable him to carefully turn or tilt a probe. Once they have been built into a machine, these mechanics are inside a vacuum, while the knobs are on the outside. “In the business of manufacturing these kind of high-end components, our customers expect precision of four decimal places,” he explains. A human hair on this scale would look like a tree trunk next to a sewing needle.
Precision mechanics work on the edge. Steingross uses the example of a tiny steel pin, half as long as a match. It connects a pacemaker to a cardiac muscle. These pins are very finely stepped and hollow. The drilled hole, which is polished and carefully deburred on the inside, is hardly visible to the naked eye. Together with researchers from the nearby Fraunhofer-Institute, Steingross and his team optimised an abrasive machining process in a way that enabled them polish the interior as required. He was still forced to decline that particular order which was in the double-digit million euros. “They expected us to deliver 1,000 components a week with an error rate of four decimal places,” he tells us. This is understandable because the burr on the inside of the pins may jeopardise the life-saving properties of the pacemaker. However, it was impossible to examine the quality of the pin’s interior with optical or tactile measuring processes, but only destroying the probe. Uwe Steingross did not want to take the liability risks. “It is rare that we reach our limits like that,” he says. His extensive prep work was not in vain. “We can now do things that we couldn’t do before, for example, drill 0.005 mm holes in high-strength metals or 0.3 mm holes in sapphire lenses.” Everything is done purely mechanical. He does not fear the competition by lasers. “They don’t make holes, they make craters,” Steingross quips.
Most of his customers are from the neighborhood. High-tech companies and research institutes order components for lasers and optical devices used in medicine and Biosystems technology, or vacuum and space technology. “We work seven days a week in three shifts and still have to decline 30 percent of incoming orders,” says Steingross. A new building for the company will soon change this.
Michael Scheiding is the company manager of Astro- und Feinwerktechnik Adlershof GmbH, or Astrofein for short, and is also a very busy man. Half of the orders his company receives are for use in high precision technology in astronautics, the other half consists of custom-built components and small batch series for customers working in lasers and semiconductors as well as aviation. Most of them are from the neighbourhood. “The technology park and my company grew up together, “says Scheiding.
If a customer requires it, Astrofein can make a 5-axis CNC mill with a precision of 5 µm, which is just half of hundredth millimeter. “How do we do it? With a lot of experience, exact knowledge of the properties of the machines and in several steps,” explains Scheiding. This expertise makes all the difference between a hundred to three-hundred µm and the possible 5 µm. It can make a world of difference when applying optical fibres, lenses, or mirrors which have to send a laser to probes and components with maximum precision.
It is not enough to claim that one is keeping to the manufacturing tolerance. Customers demand documentation and measurement protocols. Astrofein’s quality control begins before the actual manufacturing process. When the precision of the samples meets all the requirements, the serial production can begin. Used tools are a taboo. A measuring device for tools makes sure that the machines counterbalance the tool’s wear and tear right from the start. The last step are automated optical-tactile measurements with very high-precision in an air-conditioned measuring lab.
Scheidinger’s company also has its limits. “It is important to know these limits before taking an order,” he says. Astrofein does not work with ultra-precision machines or in a fully air-conditioned environment. “Our machines cost as much as a detached house. For some ultraprecision machines, you could buy a palace,” he says. Astrofein currently does not have any plans to invest in such machines and the required high-end measuring and testing technology. “Not yet. But I might consider it in the future,” Scheiding reveals. Like his neighbourhood in the technology park, Astrofein still has a lot of potential.
By Peter Trechow for Adlershof Journal
www.steingross.de
www.astrofein.com
